How to Migrate ExpressionEngine Templates to WordPress Themes
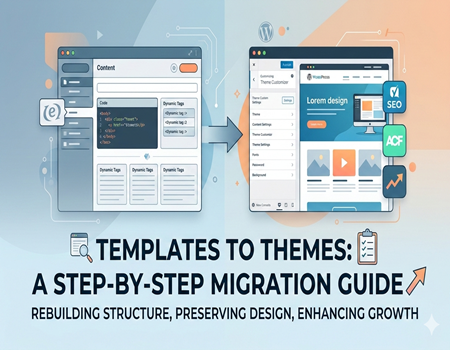
Migrating from ExpressionEngine to WordPress is not just about shifting content from one platform to another. It is about rebuilding your website structure, converting template logic, and ensuring that your design and SEO performance remain intact.
Many businesses that started their websites on ExpressionEngine years ago now feel restricted. Development costs are higher, finding experienced developers is more difficult, and the ecosystem is not as large as WordPress. Because of this, more companies are planning to migrate.
However, there is one important thing to understand. ExpressionEngine templates cannot be directly converted into WordPress themes with a simple copy and paste method. The systems work differently. The template logic, structure, and content management approach are not the same.
In this complete guide, you will learn exactly how to migrate ExpressionEngine templates to WordPress themes step by step, without losing design consistency, SEO rankings, or important functionality.
If you are planning to Migrate website from ExpressionEngine to WordPress, this guide will give you a clear roadmap.
Let’s start with the basics.
Understanding the Difference Between ExpressionEngine Templates and WordPress Themes
Before starting migration, you must understand what you are converting.
ExpressionEngine uses a database-driven template system. Templates are stored inside the system and rendered using special EE tags. Content is organized using channels, and custom fields extend those channels. The structure is flexible but requires knowledge of EE-specific syntax and logic.
WordPress, on the other hand, uses a file-based theme structure. Themes are built using PHP template files such as header, footer, single post, page, and archive templates. WordPress uses what is called “The Loop” to display dynamic content.
This means that when you migrate, you are not just transferring design. You are rebuilding template logic using WordPress functions instead of ExpressionEngine tags.
That is why this process requires planning and technical understanding.
Why Businesses Are Migrating from ExpressionEngine to WordPress
There are several practical reasons behind this shift.
First, development cost is usually lower in WordPress because the talent pool is larger. WordPress developers are easier to find compared to ExpressionEngine specialists.
Second, WordPress has a massive plugin ecosystem. Instead of building everything from scratch, you can use plugins for SEO, security, caching, ecommerce, membership systems, and more.
Third, WordPress offers strong SEO flexibility. Tools like Rank Math and Yoast SEO make optimization easier even for non-technical users.
Fourth, WordPress is more scalable for long-term growth. Whether you want to add ecommerce, courses, community features, or advanced analytics, WordPress supports it easily.
Because of these advantages, many companies decide to Migrate website from ExpressionEngine to WordPress to future-proof their digital presence.
Pre-Migration Checklist (Do Not Skip This Step)
Preparation is the most important part of a successful migration.
Start by taking a complete backup of your website. This includes the database, templates, media files, and configuration settings. Never begin migration without a backup.
Next, audit your existing templates. Identify your header, footer, navigation, sidebar components, blog layouts, category pages, and landing pages. Understand how your content is structured.
Then create a document listing all channels and custom fields used in ExpressionEngine. Include field names, field types, and relationships between content types. This will help you recreate the structure correctly in WordPress.
You must also document your current URL structure. Preserving URLs is essential for SEO. If URLs change without proper redirects, rankings can drop.
Perform a complete SEO audit. Export meta titles, meta descriptions, canonical tags, and structured data. These elements must be preserved.
Finally, decide how you will build the WordPress theme. You can choose custom theme development, a starter theme framework, or a page builder approach. For full template migration, a custom theme is usually recommended for better control.
Step-by-Step Process to Migrate ExpressionEngine Templates to WordPress Themes
Now let’s move into the core migration process.
Step 1: Set Up Your WordPress Environment
Install WordPress on a staging server instead of your live domain. Configure basic settings such as permalink structure and install essential plugins for SEO and security.
Do not perform migration on your live website. Always use staging first.
Step 2: Analyze Your ExpressionEngine Templates
Open your ExpressionEngine templates and carefully study the structure.
Identify which parts are reusable, such as headers and footers. Look at how blog entries are displayed. Understand how categories and listings work.
This step helps you understand how to rebuild the same layout in WordPress.
Step 3: Extract Static HTML
Remove ExpressionEngine-specific tags temporarily and keep only the static HTML, CSS, and JavaScript.
Clean out conditional statements and dynamic EE tags. What you will have now is a static version of your design.
This static version becomes the foundation for your WordPress theme.
Step 4: Create WordPress Theme Structure
Inside your WordPress themes folder, create a new theme directory.
Add essential theme files including style file, functions file, header template, footer template, index template, single post template, page template, and archive template.
Move your cleaned header HTML into the WordPress header file. Move footer HTML into the footer file. Then connect these templates using WordPress functions so the system loads them dynamically.
This step transforms static HTML into a WordPress-compatible structure.
Step 5: Convert ExpressionEngine Tags to WordPress Logic
This is the most important part of migration.
In ExpressionEngine, channel entries display content dynamically. In WordPress, you use the Loop to display posts.
Replace EE channel logic with WordPress post loops. Replace EE title tags with WordPress title functions. Replace body content tags with WordPress content functions.
If your ExpressionEngine site uses custom fields, install Advanced Custom Fields in WordPress. Recreate the same field names and structures. Then update your templates to display those fields dynamically.
If you used categories in ExpressionEngine, map them to WordPress categories or create custom taxonomies.
This process ensures that dynamic data works properly in WordPress.
Step 6: Rebuild Layout Using WordPress Template Hierarchy
WordPress uses a clear hierarchy system. Single posts use the single template file. Pages use the page template. Archive listings use archive templates. Category pages use category templates.
Make sure your WordPress theme follows this hierarchy properly.
This ensures your website behaves correctly for all content types.
Step 7: Add Navigation, Widgets, and Dynamic Features
Recreate your navigation menus inside WordPress. Register menu locations in your theme settings.
Set up widget areas if your site uses sidebars or footer widgets.
Rebuild search functionality and pagination if needed.
Now your WordPress theme should function similarly to your old ExpressionEngine site.
Migrating Custom Fields and Dynamic Data
ExpressionEngine custom fields may include text areas, image uploads, relationships, and grid-style repeaters.
In WordPress, use Advanced Custom Fields to recreate these structures. For more complex setups, you may need custom post types and relationship fields.
After importing content, carefully test every field. Make sure formatting, images, and relationships are displayed correctly.
Never assume data migrated perfectly without testing.
Handling URLs, Redirects, and SEO Preservation
SEO protection is critical during migration.
Try to maintain the same URL structure in WordPress if possible. You can configure permalink settings to match your previous format.
If URLs change, implement 301 redirects. This ensures search engines transfer ranking value to new URLs.
Migrate meta titles and descriptions into your SEO plugin. Reapply schema markup if used.
After migration, scan your website for broken internal links. Fix them immediately.
This step is extremely important when you Migrate website from ExpressionEngine to WordPress because losing SEO equity can affect traffic significantly.
Common Challenges During Migration
Migration is not always simple.
You may face issues with complex conditional logic used in ExpressionEngine templates. These often require custom PHP development in WordPress.
If your site includes member areas, you must recreate user roles and permissions.
Some ExpressionEngine add-ons may not have direct WordPress alternatives, so functionality may need to be rebuilt using plugins or custom coding.
Design elements may also behave differently due to CSS or JavaScript conflicts.
Large databases may require special handling during content import.
Being aware of these challenges helps you prepare better.
Testing Checklist Before Going Live
Before launching your new WordPress site, test everything carefully.
Check all pages manually. Test forms and lead capture systems. Confirm mobile responsiveness on different devices.
Run page speed tests. Validate structured data. Confirm analytics and tracking codes are working.
Check for broken links and test all redirects.
Only after full testing should you push the site live.
When You Should Hire a Professional Migration Service
Some websites are simple and manageable internally.
However, if your site has thousands of pages, complex custom functionality, ecommerce features, multilingual support, or heavy database logic, it is safer to hire experts.
A professional team can safely Migrate website from ExpressionEngine to WordPress without downtime, data loss, or SEO damage.
This ensures smooth transition and long-term performance stability.
Final Thoughts
Migrating ExpressionEngine templates to WordPress themes is not just a technical switch. It is a complete structural rebuild of your website.
It requires careful planning, template analysis, data mapping, SEO preservation, and thorough testing.
But once completed correctly, your website becomes easier to manage, more scalable, and future-ready.
WordPress provides flexibility, strong community support, and powerful growth opportunities.
If you follow this step-by-step guide carefully, you can confidently move your website without losing design quality or search visibility.
And if your project feels complex, do not hesitate to seek professional help to ensure everything goes smoothly.