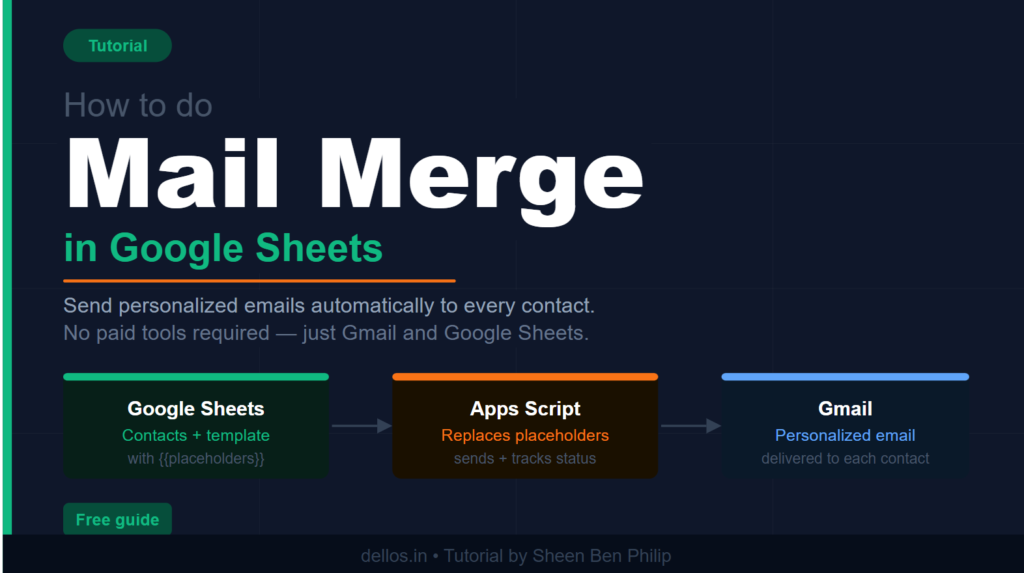
How to Do Mail Merge in Google Sheets and Send Emails Automatically
Stop paying $50/month for tools that Gmail can already do — here's how to build a fully functional mail merge inside Google Sheets, completely free.
If you’ve ever needed to send personalized emails to a list of contacts — clients, leads, prospects, or partners — you’ve probably run into tools like Mailshake, Lemlist, or GMass. They work well, but they come with monthly fees that add up fast, especially when all you need is a clean way to send 50–100 personalized emails without copy-pasting all day.
Here’s the thing: Google Sheets and Gmail can do this together, for free, with a bit of Apps Script. In this tutorial, I’ll walk you through building a mail merge from scratch — contacts list, email template, placeholders, and a send button that fires personalized emails straight from your Gmail account.
If you’d rather skip the build and get a ready-made version, I put one together — grab it here for $9.
Otherwise, let’s build it.
What You’ll Need
- A free Google account (Gmail + Google Sheets)
- Basic comfort with copy-pasting code (no coding experience required)
- A list of contacts with names and email addresses
- About 20–30 minutes
Step 1 — Create Your Google Sheet
Open Google Sheets and create a new spreadsheet. Set up the following columns in Row 1:
| A | B | C | D | E | F |
|---|---|---|---|---|---|
| First Name | Last Name | Company | Status | Sent At |
Paste your contacts starting from Row 2. The Status column will update automatically as emails go out — leave it blank for now.
A few tips on your contact list:
- Double-check email addresses before sending — failed sends waste your daily quota
- Keep the list under 100 contacts for your first test run
- The Company column is optional but makes personalization much stronger
Step 2 — Create a Second Sheet for Your Template
At the bottom of your spreadsheet, click the + button to add a new sheet. Name it Template.
In this sheet, set up two cells:
- B1 — your email subject line
- B2 — your email body
Write your subject and body using placeholders in double curly braces. These get replaced automatically for each contact:
Subject: Quick question for {{First Name}} at {{Company}}

Body:
Hi {{First Name}},

I came across {{Company}} and wanted to reach out personally.

I'm [Your Name] from [Your Company] — we help businesses like yours with [your value prop].

I'd love to set up a quick 15-minute call this week. Would [Day] or [Day] work for you?

Looking forward to connecting.

Best,
[Your Name]
[Your Company]
[Your Phone]
Available placeholders:
{{First Name}}— pulls from column A{{Last Name}}— pulls from column B{{Email}}— pulls from column C{{Company}}— pulls from column D
The more you personalize, the better your reply rates. At minimum, use {{First Name}} and {{Company}} in every email.
Step 3 — Open the Apps Script Editor
In Google Sheets, click Extensions → Apps Script.
A new tab opens with a code editor. Delete the default empty function — select everything and delete it. You’ll replace it with the script below.
Step 4 — Paste the Mail Merge Script
Copy and paste the following script into the Apps Script editor:
function onOpen() {
  SpreadsheetApp.getUi()
    .createMenu("📧 Mail Merge")
    .addItem("Send Emails", "sendEmails")
    .addToUi();
}

function sendEmails() {
  const ss           = SpreadsheetApp.getActiveSpreadsheet();
  const contactSheet = ss.getSheetByName("Sheet1"); // update if your sheet name differs
  const templateSheet= ss.getSheetByName("Template");
  const ui           = SpreadsheetApp.getUi();

  const subject      = templateSheet.getRange("B1").getValue();
  const bodyTemplate = templateSheet.getRange("B2").getValue();

  if (!subject || !bodyTemplate) {
    ui.alert("Please fill in the subject and body in the Template sheet first.");
    return;
  }

  const lastRow = contactSheet.getLastRow();
  if (lastRow < 2) {
    ui.alert("No contacts found. Add contacts starting from row 2.");
    return;
  }

  const data = contactSheet.getRange(2, 1, lastRow - 1, 6).getValues();
  let sent = 0, failed = 0;

  for (let i = 0; i < data.length; i++) {
    const firstName = data[i][0];
    const lastName  = data[i][1];
    const email     = data[i][2];
    const company   = data[i][3];
    const status    = data[i][4];

    if (!email || status === "Sent" || status === "Skip") continue;

    const personalizedSubject = subject
      .replace(/{{First Name}}/gi, firstName)
      .replace(/{{Last Name}}/gi,  lastName)
      .replace(/{{Company}}/gi,    company)
      .replace(/{{Email}}/gi,      email);

    const personalizedBody = bodyTemplate
      .replace(/{{First Name}}/gi, firstName)
      .replace(/{{Last Name}}/gi,  lastName)
      .replace(/{{Company}}/gi,    company)
      .replace(/{{Email}}/gi,      email);

    try {
      GmailApp.sendEmail(email, personalizedSubject, personalizedBody);
      contactSheet.getRange(i + 2, 5).setValue("Sent");
      contactSheet.getRange(i + 2, 6).setValue(new Date().toLocaleString());
      sent++;
      Utilities.sleep(3000); // 3 second delay between sends
    } catch(e) {
      contactSheet.getRange(i + 2, 5).setValue("Failed");
      failed++;
    }
  }

  ui.alert(`Done! Sent: ${sent}, Failed: ${failed}`);
}
Click Save (Ctrl/Cmd + S). Name the project anything you like — “Mail Merge” works.
Step 5 — Reload the Spreadsheet
Close the Apps Script tab and go back to your Google Sheet. Reload the page.
You should now see a new 📧 Mail Merge menu in the top navigation bar next to Help.
Step 6 — Approve Gmail Access
The first time you run the script, Google will ask for permission to access Gmail on your behalf. Here’s what to do:
- Click 📧 Mail Merge → Send Emails
- A permissions dialog appears — click Review permissions
- Choose your Google account
- You may see an “unverified app” warning — click Advanced, then Go to [project name] (unsafe)
- Click Allow
This is completely normal for personal scripts running in your own Google account. The script only accesses Gmail to send emails — nothing else.
Step 7 — Send Your Emails
Click 📧 Mail Merge → Send Emails.
The script will loop through your contacts, replace the placeholders with each person’s details, send the email via Gmail, and update the Status column to Sent in real time.
A summary dialog appears when it’s done showing how many were sent and how many failed.
Tips for Better Results
Keep your daily send volume under 100. Gmail allows up to 500 emails per day for standard accounts, but staying well under that limit keeps your account healthy and your deliverability high. Warm up slowly — start with 20–30, increase gradually.
Always personalize beyond just the first name. {{Company}} in the subject line dramatically improves open rates. If you have an industry or role column, reference that too.
Don’t blast everyone at once. The 3-second delay in the script is intentional — it makes your sending pattern look more human to Gmail’s filters.
Clean your list first. Remove duplicate emails, obvious typos, and role-based addresses (info@, hello@, contact@) before sending. Failed sends hurt your sender reputation.
Follow up manually on replies. This tool handles the first touch — genuine replies deserve a personal response, not another automated email.
What This Script Doesn’t Do
To keep this tutorial simple, the basic script above doesn’t include:
- Email preview before sending — you’re going in blind until it fires
- HTML formatting — emails send as plain text only
- Live status tracking — the sheet updates after each send but doesn’t give you a real-time view
- Daily send limit controls — you’ll need to manually track how many you’ve sent
- Reset functionality — resetting contacts to Pending requires manually clearing the Status column
- Custom fields — only the four built-in placeholders work
If you need any of these, you’d need to extend the script significantly — or just use the ready-made version.
The Shortcut — Ready-Made Version
If the setup above sounds like more work than you want to deal with, I built a fully-featured version of this that’s ready to use out of the box.
Gmail Mail Merge — Google Sheets + Auto Email Sender →
It includes everything covered in this tutorial, plus:
- Live stats dashboard (Pending / Sent / Failed / Skipped counts)
- Email preview before anything sends — see exactly what contact #1 receives
- HTML formatted emails with signature support
- Configurable delay and daily send limit
- One-click reset for reusing with new campaigns
- Custom field placeholders beyond just name and company
- Color-coded status (green = sent, red = failed) that updates in real time
It’s a one-time $9 purchase. Make a copy to your Google Drive, fill in your contacts and template, and you’re sending in under 10 minutes.
Wrapping Up
Mail merge in Google Sheets is genuinely powerful for small-scale outreach — and it costs nothing beyond your time to set up. The script above handles the core send flow cleanly and is a solid starting point for freelancers, agency owners, and small business owners who don’t want to pay a monthly subscription for something this straightforward.
If you found this useful, share it with someone who’s still copying and pasting emails one by one.